
          
|
Painting Secrets For Car ModelsBy Mike Poole, Originally Published in the June 2014 Issue of Sprue Examiner You can achieve a mirror finish on your car model in six steps. That’s right! Follow the six steps outlined in this article and you will see results.
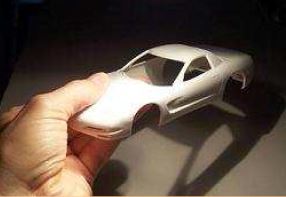
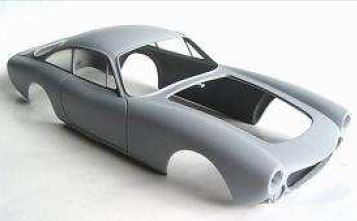
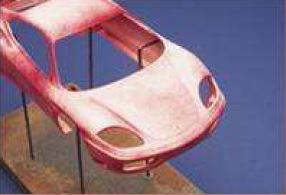
Stage 1: Fill and fine sand surfaces until perfectly smooth. Most modern car kits have fairly smooth one-piece bodies that just need some minor cleanup. It’s important to look at the parts you intend to finish under a strong concentrated light in a darkened room.
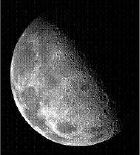
By focusing the light at shallow angles to the surface the eye can detect even the tiniest flaws. I got the angled light idea from astronomy. The best moon viewing is when it’s in crescent. The day/ night terminator shows all the surface details in vivid relief. It’s important to fix all flaws now because EVERYTHING telegraphs through a high gloss paint finish. I like to scrape down any mold lines with my knife blade to avoid leaving heavy sanding marks and use thin CA glue to fill sink holes and depressions because the stuff auto-levels and sands at the same rate as plastic and resin. For big sink holes or resin bubbles I spoon a bit of baking soda into the depression and saturate with CA glue. Avoid solvent-based putties like Squadron Brand. It never completely dries and shrinks. Also, try to avoid coarse grit sandpaper if at all possible.
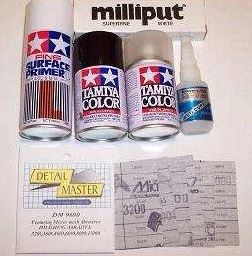
Sometimes the sanding marks can mysteriously come back around to haunt an otherwise flawless paint job. I also like to deepen opening panel lines (doors, trunk, etc.) with the back of my blade. It makes them look more realistic and prevents them being flooded during painting. Once you have the surface leveled go over the entire thing with 800-1000 grit wet/dry sandpaper for a baby smooth matte finish. This will give the body tooth for your primer to hang onto. Many auto parts stores carry 400, 600, and 800 grit wet-or-dry sandpaper. You may have to do some internet searches to find the 1000 grit but it’s worth having. Stage 2: Use Tamiya Fine White Surface Primer for your foundation. Ok, all primers are the same right? Why do we even need primer anyway? What does it do? Primer is a flat paint with enhanced adhesion properties. Gloss paint, especially paint with high solvent content like lacquer, tends to have major surface tension problems and trouble sticking to plastic that isn’t a problem with flat finishes. If you try to shoot runny gloss color onto bare plastic the paint pulls away from sharp edges and piles up at the inside corners. No matter how many coats you lay down the bare white plastic edges will show around every panel and paint will be noticeably darker around windshield molding and other raised detail. If that weren’t horrible enough imagine setting up your car on contest day only to have your fingernail chip a dime-sized chunk of paint off the hood. Now that I’ve hopefully convinced you to use primer, why Tamiya? Simply because it’s the best I’ve found and available virtually everywhere now. It’s very fine texture and pure white color won’t interfere with your color or surface finish. It’s also easy to shoot straight out of the can. Just spray a light coat or two onto your surface in a strongly lit room. Let it tack up for a few minutes and spray another light coat.
After allowing the primer to dry you can go over the surface with a fine emery cloth to remove any high spots, nibs or dust. Go easy. Don’t sand through to the base material or you’ll have to re-spray it. Recheck the body under strong light to make absolutely sure all is smooth before proceeding to the next stage. (A note for Multi-Media builders out there: If you are working with white metal body parts or photo-etch panels you will need to spray them with Tamiya Metal Primer BEFORE using the Tamiya Fine Surface Primer.) Stage 3: Decant Tamiya TS color into your airbrush and spray 2 mist and 2 wet coats. Now we get to the fun part: spraying color. Nothing gives me as great a sense of accomplishment than seeing that first coat of dazzling color on my nearly completed model. It’s also a bit nerve-wracking. Will I get a run? Did the primer stick? Is this the correct color? Is my airbrush clogging up? There are a lot of things to worry over at this stage. The first thing you can do to limit mishaps is to use predictable, high-quality paint. I like the Tamiya TS synthetic lacquer colors because they are fairly easy to use, widely available in great colors, and they last a long time if you decant the paint and spray it with an airbrush. Using your airbrush also gives you WAY more control. No matter what paint you use practice on plastic spoons or soda cans to get used to it. Much like people, every paint formula has a personality. Some are docile and easygoing. Others are ornery, temperamental prima donnas. Test!
To decant your paint from the spray can directly into your airbrush’s color cup slip a 3-4” length of clean drinking straw over the nozzle of the can while holding the can with your other hand. Gently squeeze the valve while directing the paint into your cup with the straw. There will be trapped propellant in the paint so go slowly, a bit at a time, allowing the gas to boil out of the liquid paint. Before you spray make sure the paint is the consistency of whole milk. If too thick add a drop or two of lacquer thinner to thin it the right consistency. Spray the first mist coat. We are not trying to cover the model completely on the first pass. Give priority to those hard to reach areas (wheel wells, underside of spoilers, etc.). Next, spray another mist coat so that all the surfaces are about the same color and shade of pigment. It’s ok if the surface is still a bit rough at this stage.
Now we come to the wet coat. We want to lay down just enough paint that the surface becomes smooth and move on. A strong light in your paint area really helps at this stage. Set the model in a dust free area for 15 minutes before applying the next wet coat. If you are happy with the depth of color and plan to apply a clear coat you may decide the model doesn’t need another wet coat. I personally prefer having more material than less. The paint still contains a lot of solvent that will evaporate leaving a much thinner surface than what is currently on the model. If you have a small flaw at this stage it’s easier to correct if you have some material to work with. If you plan to colorsand the color coat you will be removing material and NEED two or even three more coats of color. TS colors are usually fully dried in a day or two and you can really assess how well you did. Don’t be alarmed if the surface isn’t as smooth as it was when you first airbrushed it down wet. It’s normal for dried paint to develop fine waves and bumps in the surface. That’s why there is color sanding.
Stage 4: Optional: Decant TS-13 Clear into your airbrush and spray 2 mist and 1 wet coat. If you don’t plan to clear coat move on to the next stage. For clear coats there are three basic varieties based on their chemistry: acrylic, lacquer, and 2-part urethane. Urethane is a professional automotive product that gets great results but is exotic and beyond the scope of this tutorial.
Lacquer (Tamiya TS-13 for example) is easy to use and dries quickly and sprays just like the other TS colors. But, and it’s a big BUT, it can harm decals if they are exposed to the solvents (wet coats). Some people have had no problems simply by spraying light mist coats to cover the decals followed by slightly heavier wet coats. If you use TS- 13 over decals test it on spare decals to see how much they can take. If the clear edges start to lift or curl, they are starting to burn!
Acrylic (Tamiya X-22, Future, etc.) is forgiving and easy to use. I haven’t much experience with Future but have found X-22 takes forever to dry and will pick up fingerprints days after airbrushing. Perhaps a food dehydrator can speed drying time? Airbrushing clear is the same process as color: two mist coast and two wet coats. Make sure you have sufficient material to color sand without cutting through to the color. It’s also critical that the clear coat be thoroughly dried before proceeding to the next stage. Stage 5: Color sand dried finish with Micromesh emery cloth. What is the difference between a glossy finish and an eggshell or flat finish? It all has to do with surface roughness. A perfectly flat surface like a mirror causes all the light rays to reflect off the surface at exactly the same angle maintaining an exact but backward image. Conversely, the light rays that reflect off a rough surface bounce away randomly in all directions destroying any image that might have been reflected.
Our job at this stage is to smooth the surface down with abrasive papers in progressively higher grits until all the tiny imperfections are gone. I like to use Micromesh emery papers by Model Master. There are a total of 6 grits included: 3200, 3600, 4000, 6000, 8000, and 12000. You start with a small piece of the coarsest grit (3200) and a few drops of water. Make slow even circles about an inch in diameter. The coarser the grit the faster material is removed. Be careful around high spots like fender edges or you might burn through the topcoat and start sanding into the color coat. Stop after about 10 circles and wipe the surface dry with a clean cloth. You should see a few dark spots of paint on a lighter colored background. The dark spots are areas that are too low for the abrasive to reach, which is normal. Go over the entire painted surface with the 3200 grit in one inch circles. Next, repeat the same process with a piece of the 3600 grit emery cloth. The dark spots should be getting smaller and the surface will begin to become more reflective. If you’re tired of color sanding you can safely stop at 6000 but for the highest gloss go all the way to 12000. At this stage ALL dark paint spots should be gone and the surface should look fairly shiny.
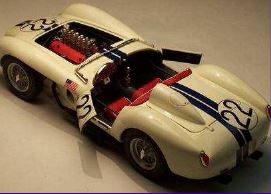
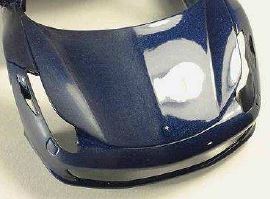
Stage 6: Final polish with Tamiya Finish Compound. The final stage is fairly simple for anyone that has waxed a real car but makes a dazzling difference and is quite exciting to do.
I use Tamiya Finish Compound or Novus can be used in a pinch. Basically, squirt a small dab on a clean white cloth like an old t-shirt or a cotton ball. Slowly apply the polish in 1 inch circles just like you did in the color sanding stage. As the polish dries and gets picked up in the cloth you should see a dazzling shine emerge on the surface. If not, do it again until the shine pops. Remember that polish is sandpaper in liquid form. While you’re not removing as much material as you did color sanding you can still burn through edges, door handles, etc. It would be a shame to ruin your paint job after all this work, so be careful. After the entire body is polished the only thing left to do is clean any excess polish out of the panel lines and congratulate yourself on achieving a mirror paint finish. |


© Copyright 2015, Austin Scale Modelers Society (ASMS)