
          
|
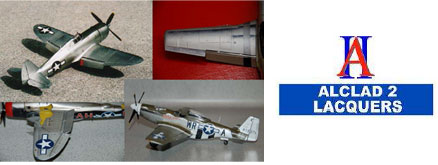
Alclad II Lacquer Natural Metal FinishesBy Bob King, Originally published June 2013
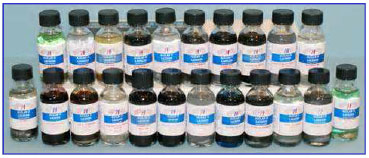
Alclad II is a cellulose based lacquer that dries almost instantly. It has seventeen natural metal finishes, four prismatic colors, three plastic base coat/ primers, and six transparent colors. It will produce a wide range of realistic and durable metal finishes on aircraft, cars, trucks, armor and figures. It is pre-thinned for airbrush use and no buffing is required. A list of Alclad II finishes is as follows:
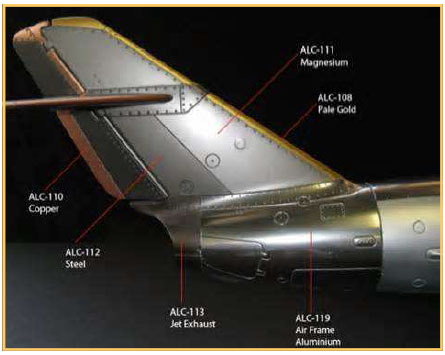
Important: One must prime the plastic model before using Alclad II. The primers protect the plastic from a crazed finish due to microscopic weaknesses in the plastic surface. I have used and recommend the following: Tamiya Silver Leaf spray: The primer is very thin. It will not cover any detail and looks like a very bright shiny aluminum. Is also excellent primer base for panel shading with Alclad II transparent smoke. Tamiya Semi Gloss Black spray: This primer coat is also thin. It will produce a finish that is not too shiny. It works well on the engine portion of the fuselage to provide a contrast with the remainder of the fuselage that has been primed with the above mentioned silver leaf. It is also an excellent base for a radial engine. It seems to add weight to the metal finish. Alclad II Clear base: The manufacturer states that the new high shine shade airframe aluminum looks very good over their primer. I have tried it and it leaves a bright shine. Gloss Black enamel: This is an excellent primer for high shine finishes of chrome or highly polished metals since it traps most of the light falling on it. Or for that matter any gloss black surface. The chrome shade will only produce a robust finish when applied over a dark gloss base coat. Their enamel base coat needs several days to cure before applying the Alclad II shade. Acrylic Auto Primer/Krylon: This works well on resin parts as well as styrene plastic. Sand it with 1000/1200 wet/dry sandpaper. This primer is very fragile. One should be careful not to sand through to the bare plastic. This is really important if you are polishing over an angle or raised surface. It is very hard to re-prime and cover Alclad II on such a small area without having an inconsistent finish. Alclad II Gloss Black base: You should allow this primer coat to dry 24 hours, It is very easy to use since it is already thinned and ready to airbrush out of the bottle. It is surprisingly transparent and it is often necessary to apply two coats for complete coverage. It is very smooth. Alclad II Gray primer/micro filler: This works well on hairline seams that need filling. Allow 30 minutes to dry and sand it with micromesh or ultra fine wet/dry sand paper. Tamiya Gray/White primer: Be sure to sand the Tamiya primers with 1000/12000 wet/dry sandpaper. This comes out of a spray can and it is really quick and easy. Future Floor Finish: This should be allowed to dry completely. I would not cover it with Alclad II for at least 24 hours. The longer you can wait the better. Krylon Gloss Black (a lacquered based spart paint): This is an old favorite. You must allow it a full day to cure but it provides an excellent base for a super high gloss finish. It does not go on ultra smooth, so you should wet sand after it dries. Caution! Alclad II is loaded with vapors that you should not breathe over a prolonged period. Alclad II contains the following: Normal Butanol, Methyl Ethyl Ketone, Methyl Isobutyl Ketone,and Toluene. Some Alclad II components are highly flammable and can cause slight to severe neurological, liver, and kidney damage. Exercise more than a modicum of caution when using this product.  It is safe to handle and use with proper precautions. So, use proper precautions. Use adequate ventilation, in case of eye contact rinse your eyes with water and if swallowed contact a physician immediately. Keep out of reach of children. When spraying with Alclad II use a multi-purpose professional respirator with cartridges for organic vapors. Before starting to airbrush, one should always shake the bottle very well. I immediately shake each color just before placing it in the airbrush. It really makes a difference. One should look carefully at the primed surfaces for any imperfections. If you find one, mask off the area and reprime with several light coats. Sand until the surface is perfect. Wipe the model to remove any fingerprints. This really is important for a black gloss enamel surface that will be sprayed with a chrome finish. Alclad II Lacquer must be airbrushed on a surface that has been primed and cleaned. I spray at 10-15 psi or less. I use a gravity feed airbrush, so the low pressures work fairly well. I seldom airbrush more than eight to ten drops at a time. Apply the Alclad II at approximately a 45° angle or less to the surface on your initial application. This will allow for a thin coat that blends evenly across the surface. You should spray one to two light coats, waiting one to two minutes between coats. Alclad II will go a long way if you do not waste it by using more than you need for each application. When transferring Alclad II to your airbrush use a pipette. Do not pour it into your airbrush since it is very hard to control. Transfer less than you think you will need. Be sure to recap the bottle immediately after using. (I prefer to use about eight drops at a time.) Prepare all small parts for your model that you want to have a natural metal finish. This could include gun barrels, wheels, radial engines, pilot tubes, etc. Then, after you have finished spraying your primary surface, empty the remaining paint in the airbrush on these small parts. I like to use several shades on these parts for a unique finish. Once it really looks good, set it aside. (You can do some of your best work cleaning out the airbrush.) One needs to guard against spillage by knocking over the container. The containers are 1 3/16th inches in diameter and three inches tall and made of glass. The container must be secured, or it will spill. I use a cluster of empty bottles in a larger container that serves as a base. The empty bottles can be used to set pipettes in and hold enough lacquer thinner for cleaning the airbrush. You can accommodate different sized bottles by simply removing or adding various bottle sizes until they wedge themselves securely together. One should save the empty glass bottles. They make an excellent bottle to mix paint and thinner in and they are tall enough to easily hold the long pipettes. The best way to save Alclad II is to use less of it. The darker the primer base, the more Alclad II is needed to cover it. I love using Tamiya’s Silver Leaf Spray, TS-30. It requires only the lightest coat of Alclad II to achieve the desired natural metal shade. Conversely, one can use Tamiya’s Semi-Gloss Black, TS-29 as a base coat for Alclad II Jet Exhaust, on a propeller. You will use less Alclad II over primers that are closer to the final shade you are trying to achieve. The exception to this approach is the use of the High Shine Shades which most often use a glossy black primer to optimize their unique light absorbing qualities. Before starting to spray your model, plan out the sequence of colors that you want to use on the model. I prefer to use two basic primer colors. I first apply an overall coat of Tamiya Silver Leaf TS-30. I then determine where I want a uniform darker color. I mask and spray that area with Tamiya Semi- Gloss Black TS-29. 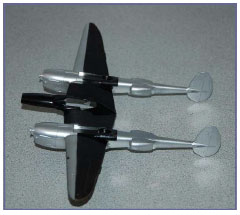 I prefer to use these primers because of their durability and fast drying time. They are dry to the touch in about 20 minutes, and they will not hide any of the detail on the model. I then lightly buff the surface with an old t-shirt. The old t-shirt is very soft and adds not a hint of lint residue. This light buffing will remove any primer that has not adhered to the plastic. The primers will set the basic undertone for different areas of the model. I have used many variations that I will set forth in the following section. It is really fun to experiment with different shading techniques. Once your basic primer colors are in place and you have determined what shades you will be using and where, start by using the darkest shades first. For example: Start with Steel (112 ), follow with Magnesium (111), follow that with Duraluminum (102), then Aluminum (101, then White Aluminum (106) lightly airbrushed over all of the metal shades. 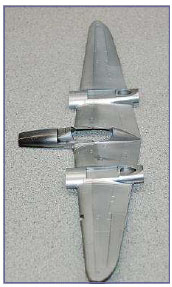 Alclad II dries fast and is very durable. After I have applied each shade, I buff the application with a soft cotton cloth. Next, mask the area and proceed to the next color. Tamiya masking tape works extremely well over Alclad II. It will not leave any residue and can be left on the surface for months. Alclad II dries fast and is very durable. 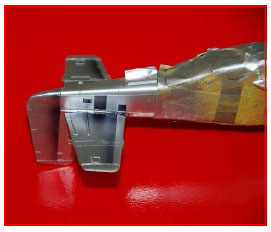 After you have finished applying all of the various shades, remove all of the masks from the natural metal shades exposing them for a very light coat of White Aluminum. This will “unify” all of the panels and give the model an overall consistent appearance. Next, you should highlight the model with shades such as Pale Burnt Metal, Jet Exhaust, and Transparent Smoke. Aircraft use different sorts of metal with different grains that affect the natural metal finishes appearance. By varying these shades, your aircraft will appear more realistic. The variations may be achieved several ways. 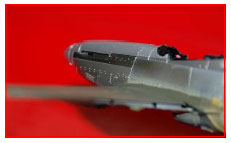 The panel is first airbrushed with a coat of gloss black and it is followed with a translucent coat of Chrome (107). Next, you spray the center of the panel with a regular shade of Aluminum (101). This shade is not translucent and therefore appears lighter in color. After that, follow with another coat of translucent Chrome(107). The result is variability in surface color. The panel is first airbrushed with a coat of gloss black. Then, the inner portion of the panel is sprayed with a glossy gray. Once you have the black and gray glossy surface the way you want it, spray the translucent Polished Aluminum (105),Chrome(107), or Airframe Aluminum(119). Pre-shade over the Tamiya Silver Leaf Spray TS-30 with any of the Alclad II darker, regular shades. This is especially useful when applying an exhaust or oil streak on an aircraft fuselage. It is easier to cover the exhaust that you do not want with subsequent applications of regular metal shades. Transparent Smoke(405) is my favorite method of preshading aircraft panels. It can be used to simulate a panel that is not uniform in color or provide a slight contrast to a nearby panel. I prefer to use this method by a large margin. It is by far the most economical way from a time and money standpoint. Using the regular shades over the transparent smoke uses the least amount of Alclad II and the finish possibilities are almost limitless. I first spray Tamiya Silver Leaf, TS-30, for the base primer coat. The Alclad Transparent Smoke surface appearance is somewhere between smoke and blue steel. Shading is very easy to accomplish since it can be laid down anywhere between transparent and opaque. It can also be sprayed directly over the NMF Alclad II shade and then recoated with another NMF Alclad shade. It is very versatile. I have also painted with it over Tamiya, Polly S, and Gunze Sangyo acrylics and then repainted over it with Alclad II NMF shades. It gives a very nice effect.  Alclad II regular natural metal shades may be tinted with small amounts of enamel or auto acrylic. Tint only the Alclad II that will be immediately used. Alclad II High Shine shades should not be tinted. The transparent smoke may be applied so that the base coat is almost translucent to an opaque blue, black cover. any of One can use any of the regular shades or high shine shades over the Silver Leaf and Transparent Smoke combination. You also have the further option of using a regular shade over this combination to achieve another variation. These layers of Silver Leaf and Alclad II are so thin that you are still able to achieve these effects without the appearance of “out of scale” paint build up. It is also easier to achieve the desired result by using your airbrush to its best advantage. I believe that it is better to gradually take away what you do not want on the surface, rather than paint exactly what you want directly onto the surface with an airbrush. It is especially true when doing variations on a panel or rendering exhaust stains. Seldom do I wait much more than ten minutes before masking for the next shade application. I prefer to mask with Tamiya masking tape. It has a razor sharp edge and it holds its place when buffing against it. I use Scotch 3M Scotch-Blue Painters Tape for Multi- Surfaces to mask large areas. It is a medium-adhesive mask that is not too expensive. Note: When one is removing masking tape from an Alclad II surface, be careful not to scratch the surface with a fingernail or x-acto blade. The scratch will not cover with just a second coat of Alclad II. After a bit of practice, you do not even need to use masking tape between panels. You can do a number of shades using only a 3x5 card, damp paper, or a post-it note for a mask. Testor’s Metalizer Finishing System does not require a protective primer to be used over the styrene plastic. It can be used to touch up an area that you may have sanded through or created through a masking glitch.
Use it sparingly, but it can really get you out of some bad spots. It is not as durable but it will give you a beautiful finish. Painting over Alclad II can be done with almost any other paint. It is a very good surface to mask over and, if one is painting with an acrylic or enamel, it can be removed without harming the original surface. The acrylic paints adhere quite well to Alclad II. Tamiya acrylic paints can be easily removed with Windex. An ultra diluted mixture of Winsor & Newton’s Winton Oil Color Raw Umber and lighter fluid works very well on Alclad II surfaces. It should be applied before you clear coat the model for decaling. If you are unhappy with the results of the panel highlights, it easily wipes away showing no trace of being applied. I prefer this solution because it is very subtle. If it is necessary to remove Alclad II, Gunze Sango thinner will remove Alclad II and its primer from styrene quickly and easily without harming it. This thinner is called Mr. Color Thinner. I call it the magic elixir. It is an organic solvent that has many applications but I think this is a really outstanding use for it.
Alclad II regular metal shades can be directly decaled over. Alclad II high shine shades should not be directly decaled over because decal setting solutions will mar the finish. I usually use a clear coat before decaling. Airbrush the clear coats for the decals on ultra-light and polish them with 8,000/12,000 micromesh to place and protect them. If you plan to model an aircraft that is dull and weathered, use Tamiya Smoke (X-19) for the clear base coat. It is easily applied and can be easily removed with a rag soaked in Windex should you want to redo your results. The Alclad II will not be affected by the Windex. Prismatic colors should be applied over a glossy dark base. Alclad Gloss Black Base or Tamiya Gloss Black TS-14 are excellent base coats. One should spray prismatic colors at 20 psi using a wide spray pattern and a large tip. The metallic particles in the prismatic colors are very large and require a large tip. Cover the surface with as few passes as possible. The prismatic colors will appear slightly rough when dry. This is normal. Overcoat prismatic colors with two coats of clear to obtain a deep reflective finish.
Alclad II is an outstanding way to do natural metal finishes for model aircraft. [Editor’s note: Photos on this page courtesy of Alclad II/Tony Hipp. All others courtesy of Bob King.] |
© Copyright 2014, Austin Scale Modelers Society (ASMS)